How to Convert WordPress Images to WebP (And Why You Should)
WebP images are 25-35% smaller than JPEG and PNG while maintaining the same visual quality. If you're not using WebP on your WordPress site in 2025, you're wasting bandwidth and hurting your search rankings.
What is WebP?
WebP is a modern image format developed by Google that provides superior compression compared to traditional formats. It supports both lossy and lossless compression, plus transparency (like PNG).
WebP vs Traditional Formats
Why Convert to WebP?
1. Faster Page Load Times
Smaller images = faster loading. Slow images can destroy your site's performance. Google's data shows that as page load time increases from 1s to 3s, bounce rate increases by 32%.
- Users see content faster
- Less bandwidth consumed (crucial for mobile users)
- Lower hosting costs (less data transfer)
2. Better SEO Rankings
Google uses Core Web Vitals as ranking factors for image SEO. WebP directly improves Largest Contentful Paint (LCP), one of the key metrics.
GOOGLE'S RECOMMENDATION
"Use next-gen formats like WebP and AVIF to reduce image transfer sizes and improve page load performance."
— Google PageSpeed Insights
3. Improved Mobile Experience
Over 60% of web traffic is mobile. WebP images load faster on slower connections and consume less mobile data.
4. Excellent Browser Support
As of 2025, WebP is supported by:
- Chrome/Edge: 95%+ (since 2010)
- Firefox: 93%+ (since 2019)
- Safari: 97%+ (since 2020)
- Mobile browsers: 96%+ coverage
For the ~3% of users on older browsers, you'll serve fallback JPEG/PNG images automatically (we'll cover this below).
How to Convert WordPress Images to WebP
There are three main approaches. Choose based on your technical comfort level and site size.
Method 1: Using a Plugin (Recommended)
Image optimization plugins handle everything automatically: conversion, fallbacks, and serving the right format to each user.
Using Altomatic Plugin
Step 1: Install and Activate
Go to Plugins → Add New, search for "Altomatic", install and activate.

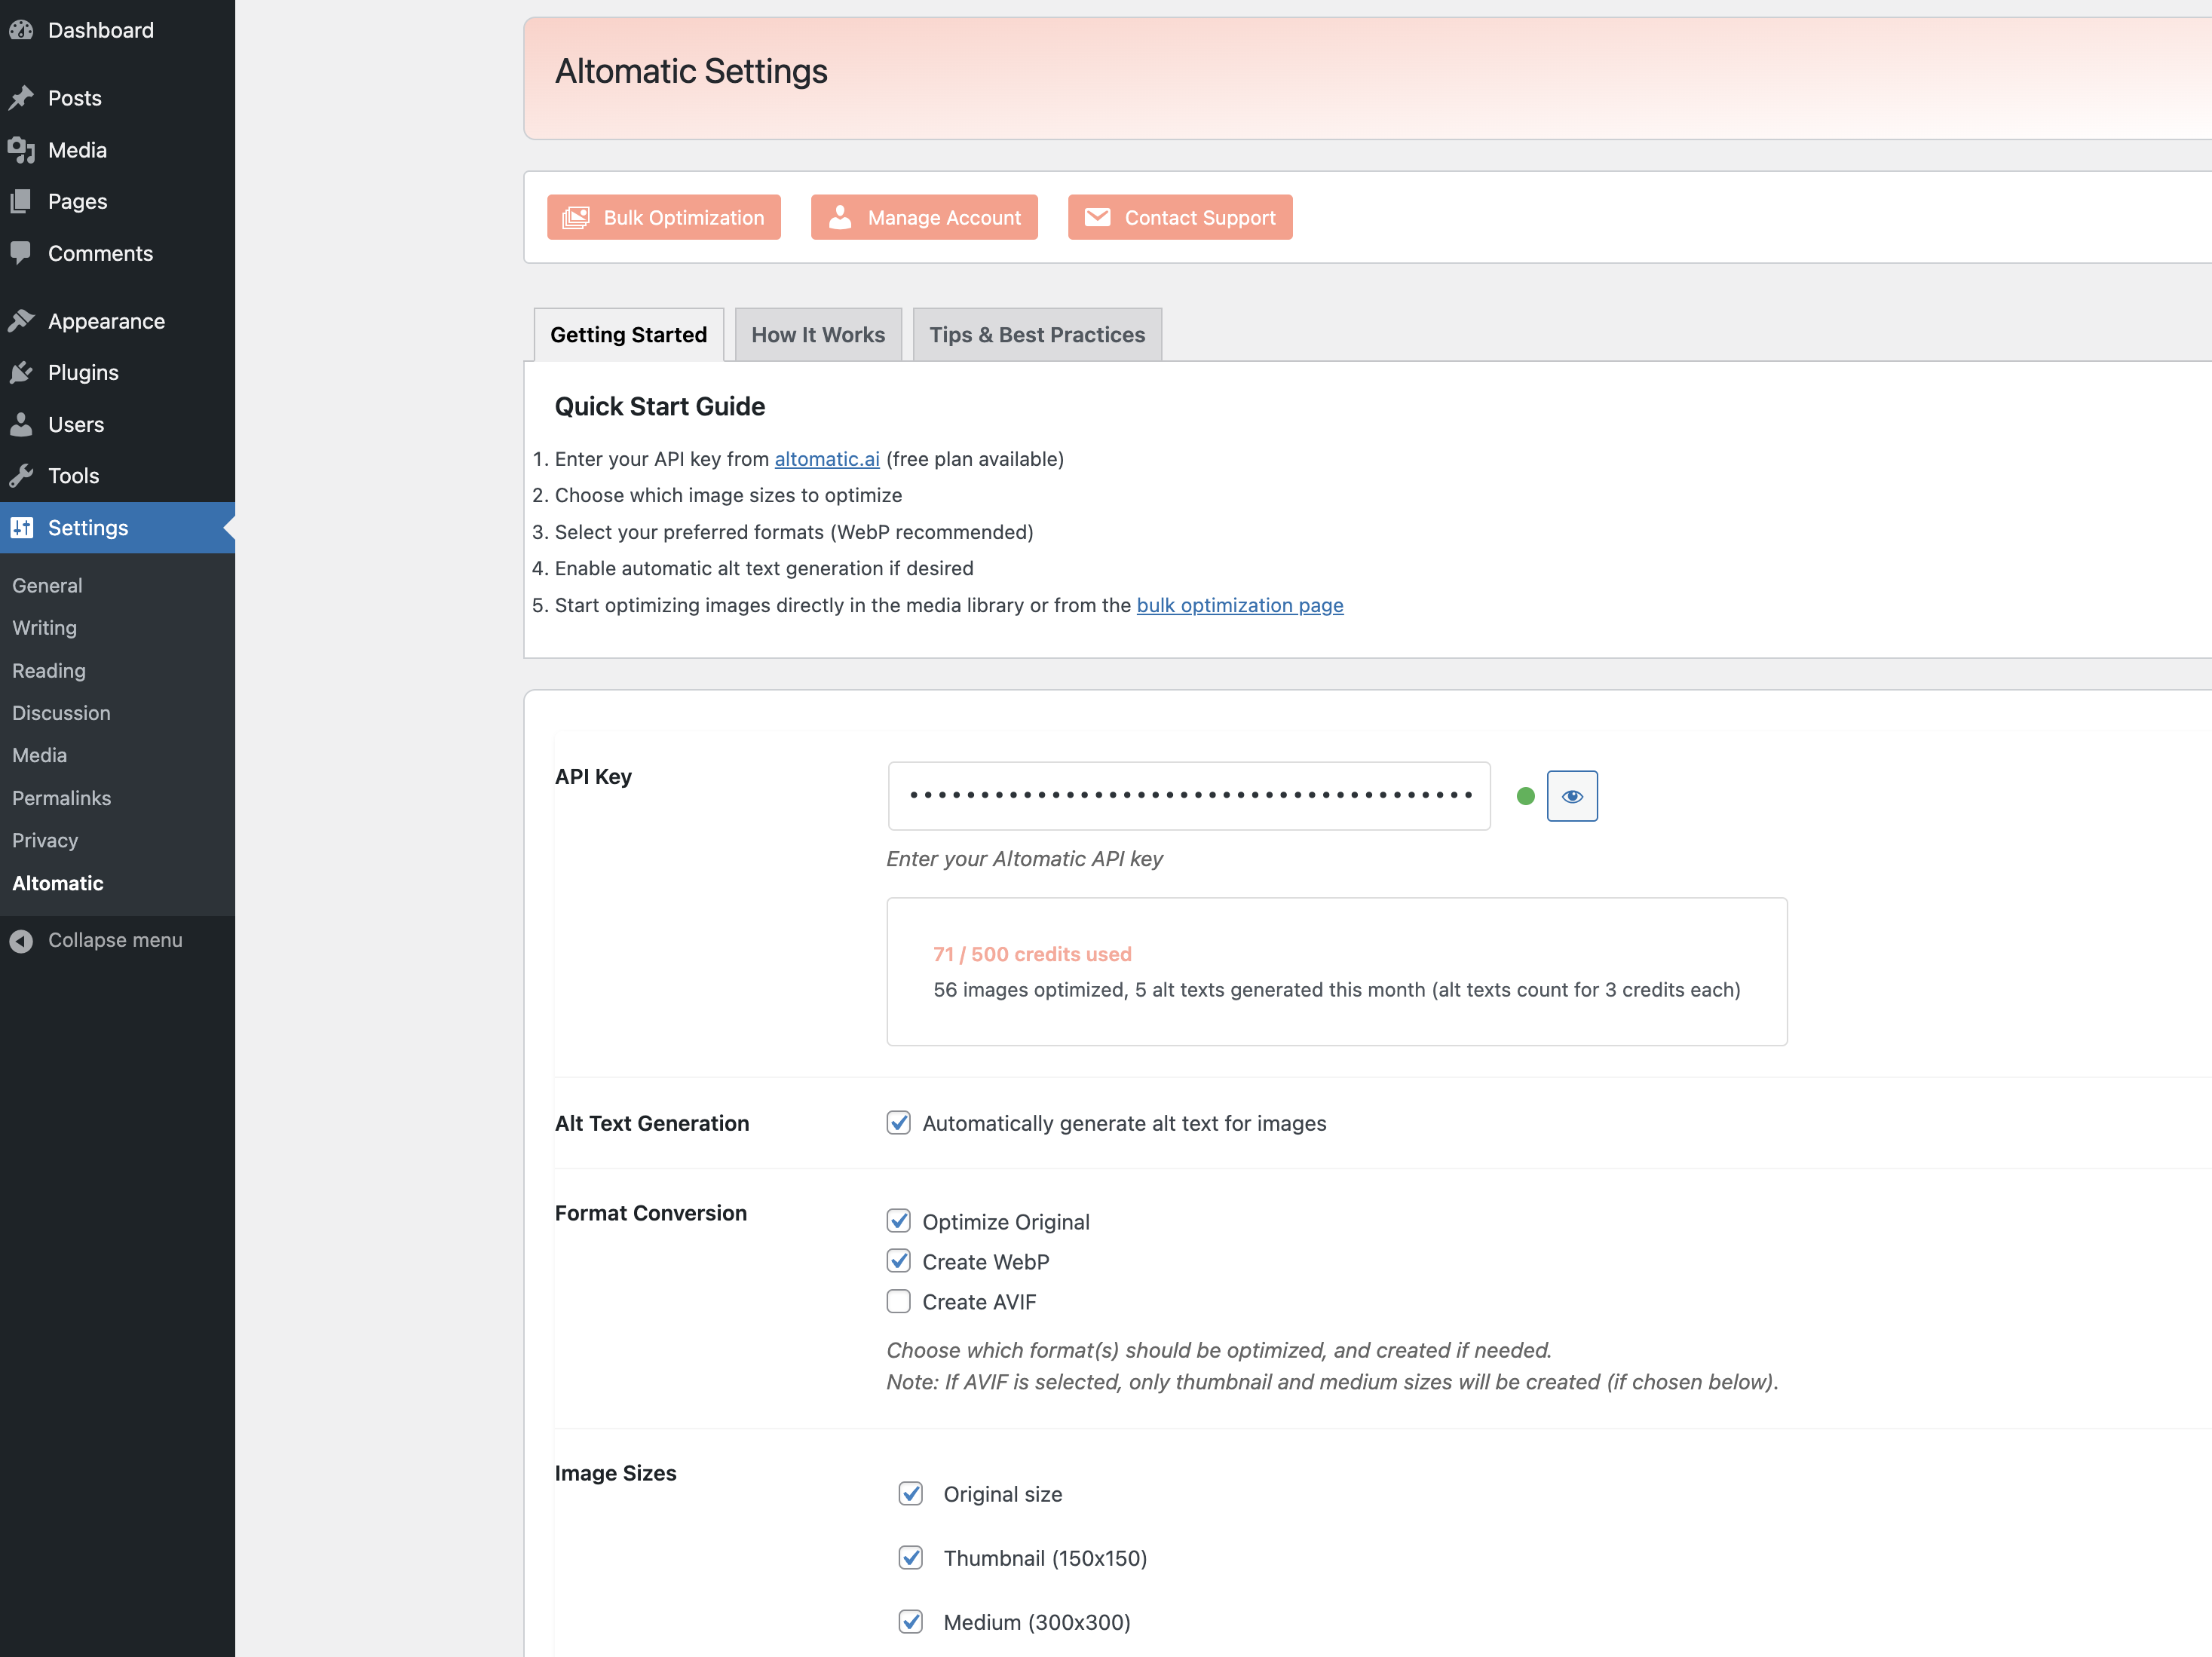
Step 2: Configure Settings
Navigate to Settings → Altomatic:
- Enter your API key (sign up at altomatic.ai for 50 free credits/month)
- Enable "Convert to WebP" option
- Optionally enable AVIF for even better compression
- Choose whether to keep original images as fallbacks
Step 3: Convert Existing Images
Go to Media → Bulk Optimization:
- Select "Convert to WebP" option
- Choose whether to process all images or just specific ones
- Click "Start Bulk Optimization"
- Monitor progress - processing continues in background

Step 4: Automatic Future Conversions
Enable "Auto-optimize on upload" in settings. New images will automatically convert to WebP when you upload them.
Why This Method Works Best
- • Automatic fallbacks to JPEG/PNG for older browsers
- • Processes in batches to prevent server timeouts
- • Can also generate AI alt text while converting
- • No server configuration required
Method 2: Using .htaccess Rules (Advanced)
If you have WebP versions of your images on the server, you can use .htaccess to serve them automatically.
Add this to your .htaccess file:
<IfModule mod_rewrite.c>
  RewriteEngine On
  RewriteCond %{HTTP_ACCEPT} image/webp
  RewriteCond %{REQUEST_FILENAME}.webp -f
  RewriteRule ^(.*).(jpe?g|png)$ $1.$2.webp [T=image/webp,E=accept:1,L]
</IfModule>

<IfModule mod_headers.c>
  Header append Vary Accept env=REDIRECT_accept
</IfModule>
Important Note
This method requires you to manually create WebP versions and doesn't work with all hosting providers. Only use if you're comfortable editing server files.
Method 3: Using <picture> Tags (Manual)
You can manually specify WebP sources with fallbacks using HTML picture elements:
<picture>
  <source srcset="image.webp" type="image/webp">
  <source srcset="image.jpg" type="image/jpeg">
  <img src="image.jpg" alt="Description">
</picture>
This gives you maximum control but requires manually editing every image. Not practical for WordPress sites with hundreds of images.
Do You Need to Keep Original Images?
Short answer: Yes, for fallback support.
Most WordPress WebP plugins work by:
- Creating WebP versions alongside original JPEG/PNG files
- Detecting browser support automatically
- Serving WebP to compatible browsers
- Serving original format to older browsers
This dual-format approach ensures compatibility while maximizing performance for 97% of users.
What About AVIF?
AVIF is even newer than WebP and offers 20% better compression. Browser support is now at 90%+ (as of 2025).
Recommended Strategy for 2025:
- 1. Generate AVIF version (smallest, for newest browsers)
- 2. Generate WebP version (fallback for slightly older browsers)
- 3. Keep JPEG/PNG original (fallback for legacy browsers)
Altomatic and other modern plugins can generate all three formats automatically, serving the best option to each visitor.
Testing Your WebP Implementation
1. Check Image Format in Browser
- Right-click an image on your site
- Select "Inspect" or "Inspect Element"
- Look at the Network tab
- You should see images loading as .webp

2. Use Google PageSpeed Insights
Run your site through PageSpeed Insights. If WebP is working correctly, you should no longer see "Serve images in next-gen formats" warning.
3. Test Fallback Support
To verify fallbacks work:
- Use a browser that doesn't support WebP (like Internet Explorer)
- Or use browser DevTools to disable WebP support
- Images should still load (as JPEG/PNG)
Common Issues and Solutions
Issue: WebP images not displaying
Solution: Check that your server's MIME type is configured correctly. Add to .htaccess:
AddType image/webp .webp
Issue: Images not converting in bulk
Solution: Your server may have a timeout limit. Process images in smaller batches (100-200 at a time) or use a plugin that processes in the background.
Issue: WebP images larger than originals
Solution: This can happen with already-optimized PNGs with transparency. Configure your plugin to only convert when the WebP version is smaller.
Issue: CDN not serving WebP
Solution: Purge your CDN cache after converting images. Most CDNs (Cloudflare, etc.) support WebP but need to be told to cache new versions.
Next Steps
- Test your current setup
Run PageSpeed Insights to see if you're already serving WebP
- Choose a conversion method
Plugin method is easiest for most WordPress users
- Convert existing images
Start with your most-visited pages, then bulk process the rest
- Enable automatic conversion
Set up auto-optimization for future uploads
- Monitor performance improvements
Track page load times and Core Web Vitals scores
Convert to WebP in Minutes
Altomatic automatically converts your entire WordPress media library to WebP and AVIF with proper fallbacks. Plus, generate AI alt text at the same time.